From "Cook the Vineyard"
Cheese gets all the love, but truthfully the right bread is key to a good grilled cheese.
BY SUSIE MIDDLETON
Here’s a master recipe for a delicious grilled cheese that you can use as a template and vary as you like.
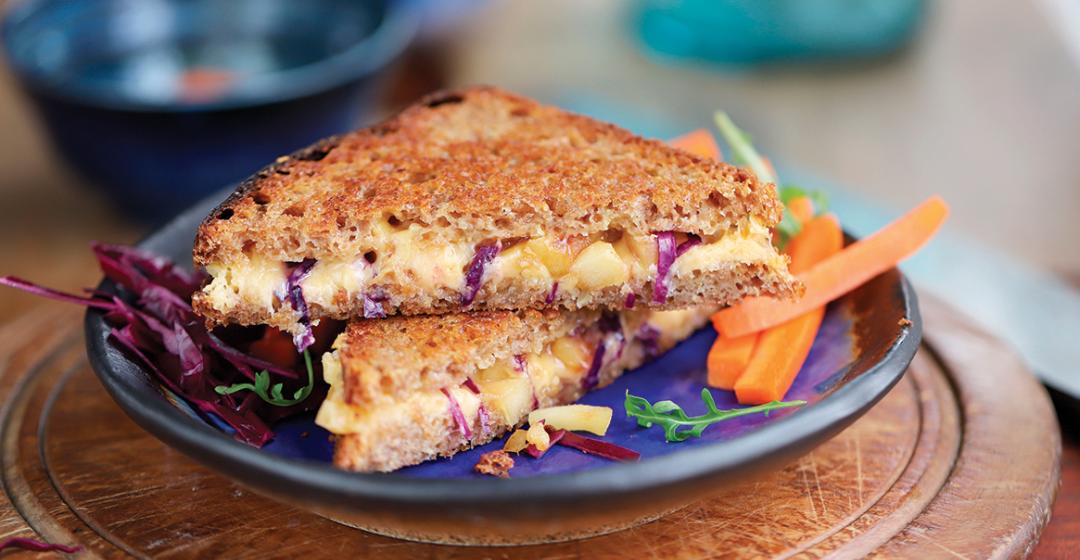 |
| Cinnamon Starship’s einkorn bread with gouda and apple |
Cheese gets all the love, but truthfully the right bread is key to a good grilled cheese. (Even better: locally made Artisan bread.) Anything floppy and full of preservatives is going to give you a sad grilled cheese. What you’re looking for is firm structure (a few airy holes are bonus pockets for melting cheese and butter) and robust flavor (think multi-grains, sourdough wheat, or cheese bread – double the cheese!). Freshly baked Island artisan bread is ideal.
While cooking the perfect grilled cheese has a lot to do with getting to know your own stove and cookware, there are a few technique tips to follow. Years ago, I learned from Laura Werlin, author of six cheese books, to cover the pan for the first half of cooking – this assures that the cheese will be melting at about the same rate as the bottom is browning, provided you don’t crank up the heat too much. Then when you flip the sandwich, you want to leave the cover off so that trapped moisture doesn’t soften that nicely crisped topside. So choose a skillet (I like my nonstick straight-sided 10-inch pan) with a cover to make grilled cheese. No cover? Improvise with a sheet pan.
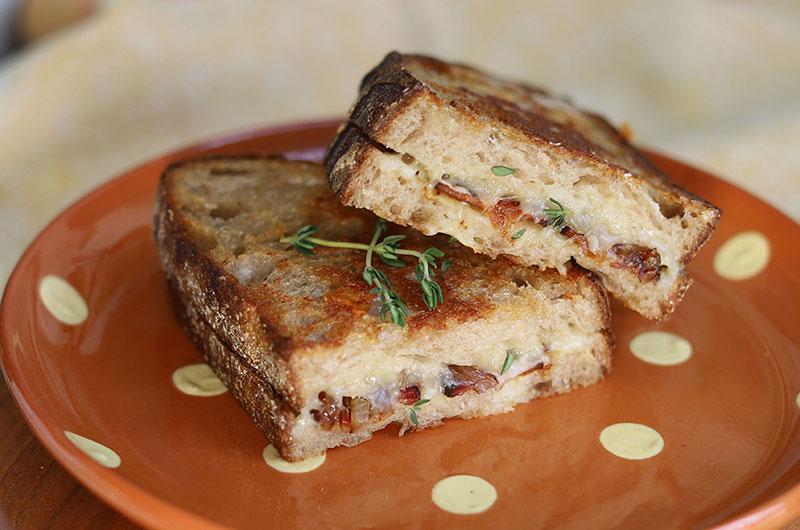 |
| Grey Barn’s wheat bread with cheddar, bacon, and shallots makes a great grilled cheese. |
As far as cheese goes, I favor a sharp cheddar or an aged gouda for their assertive flavor and because they soften but also hold their shape. If you like ooey-gooey, choose a younger cheddar or gouda (or even brie or camembert); you may have to adjust the heat up a bit to brown and crisp your bread before the cheese melts too much. I’ve also given you choices for additional ingredients to layer into your sandwich. Just keep a light hand with those add-ins – you can skip them altogether if you’re a purist. And don’t forget a sprinkling of sea salt; it really makes the sandwich.
Makes 1 sandwich
Ingredients
- 2 slices (of equal size) firm-textured artisan bread (ideally Vineyard made), about ½-inch thick each
- About 2 ounces sharp cheddar, young or aged gouda, gruyère, Jarlsberg, or Monterey Jack cheese
- Unsalted butter, softened
- Dijon mustard, honey mustard, or pesto (optional)
- Sea salt
- Add-ins (optional, choose one or two): 2 tablespoons sautéed sliced shallots, sautéed diced apples, or sautéed diced mushrooms; 1 tablespoon finely sliced red or Napa cabbage (quick-pickled or briefly sautéed), finely chopped kimchi or other pickles; 1 tablespoon minced sundried tomatoes or minced roasted peppers
- 1/4 to ½ teaspoon fresh thyme leaves, sliced fresh chives, or other fresh, tender herb
- 2 thick-cut slices applewood smoked bacon (cooked) or 2 to 3 thin slices salami, sliced into strips and sautéed until crisp (optional)
Directions:
1. Arrange all of your ingredients on your countertop. Put your bread slices on a cutting board or other work surface. Slice your cheese so that you (ideally) have enough to completely cover one piece of bread and have a few thin slices leftover (which you will use at the end of assembly).
2. Spread softened butter (about 1 teaspoon) generously over one piece of the bread. Sprinkle sea salt over the butter. Turn that piece over and spread the other side lightly with Dijon, honey mustard, or pesto if you like. Do not spread anything on the other piece!
3. Put another 1½ to 2 teaspoons butter in a skillet (that has a lid) on the stovetop. Turn the heat to medium-low. When the butter has melted, sprinkle a little sea salt over it.
4. Meanwhile, assemble the sandwich starting with the unbuttered slice of bread. Cover the slice with cheese, sprinkle add-ins and herbs across the cheese judiciously, and top with bacon or crisped salami, if using. Finally, top with a few very thin slices of cheese. Cover with the buttered slice of bread (butter side up) and transfer the whole sandwich to the warm pan, centering in the pool of melted butter. Turn the heat up just a notch to a lowish-medium (between medium-low and medium, depending on your stove) and cover the pan.
5. Cook, covered, for about 3 minutes, or until the bottom side is golden brown and you can see that the cheese has begun to melt. Don’t walk away. Check with a spatula after a couple of minutes if you think the pan is too hot (you might smell or hear the browning picking up) or not hot enough, and adjust the heat if necessary. Err on the side of less heat, especially when using firm cheese. A little longer in the pan won’t hurt. But do get that good bread nice and crisp.
6. Uncover, flip carefully, and continue to cook about 3 minutes more until the bottom side is nicely browned and crisp and the cheese is beginning to drip down the sides of the bread. Remove from the pan, let cool a few minutes, slice in half, and serve.